Replacing your JCB telehandler wear pads is a critical job. It's what stops the steel boom sections from grinding themselves into scrap, saving you from a catastrophic, five-figure repair bill down the road. This guide cuts through the usual dealer nonsense to give you a gritty, step-by-step process for spotting bad pads, getting the right parts without the markup, and doing the replacement yourself, in the dirt.
The whole point is to get your machine back to work, not wait around for a service truck with a "Dealer Laptop" that locks you out.
Diagnosing a Sloppy Boom and Why You Can't Ignore It
That grinding noise you hear when the boom extends isn't just an annoying sound. It’s the sound of money leaving your wallet. Your machine is screaming that its wear pads are shot, and ignoring it is the fastest way to turn a straightforward parts swap into a major teardown. A sloppy, chattering boom isn't something you can just "run for a few more days."

Out in the field, I see the same symptoms time and time again. These are the classic signs that your pads are gone and you’re grinding steel on steel. Don't wait until it fails completely before you take action.
Telltale Signs of Worn Wear Pads
The early warnings are subtle, but they get worse fast. You need to know what to look and listen for, especially on high-hour machines like the JCB Loadall 535 and 540 series, which are notorious for eating through pads under heavy, daily use.
- Boom Chatter Under Load: When you lift a heavy pallet or extend the boom, does it jerk or shudder? That's the first sign of excessive play between the boom sections because the pads aren't holding everything tight anymore.
- Grinding or Squealing Noises: As the pads wear away, you'll hear a very distinct metal-on-metal grinding noise during extension or retraction. That's the sound of the boom sections scraping against each other.
- Visible Metal Dust: Take a close look around the ends of the boom sections. If you see a fine, dark dust that looks like metallic glitter, those are metal shavings from the boom itself. This is a critical warning sign.
- Jerky or Uneven Retraction: A boom that hesitates or binds when you try to pull it back in is a clear indicator that a worn pad has shifted, broken, or completely fallen out, creating a blockage.
The second you hear that grinding, stop. Every cycle you run with shot wear pads is actively destroying the boom. You're gouging the steel, creating uneven surfaces that will chew through your new pads in record time if you don’t address the root cause.
The Real Cost of Waiting
Ignoring these signs is a gamble you can't afford to lose. With over 200,000 JCB telehandlers working globally, the data is pretty clear on this—it’s a critical maintenance point. Service reports show that putting off wear pad replacement leads to 25% more boom failures annually, costing operators an average of $5,000 per incident. Timely replacements on popular models like the 535-95 and 540 can slash machine downtime by as much as 18%, keeping you on the job instead of waiting for a repair truck. You can learn more about how these crucial parts function over at plantsparesonline.com.
This isn’t about calling the dealer to hook up their "Service Master" laptop; a computer can't diagnose mechanical wear. This is about taking control of your iron before a simple parts swap becomes a multi-day ordeal involving welding, machining, and a bill that will make your eyes water. Forget waiting for them—with the right parts from a source like Flat Earth Equipment, you can get the sensors, solenoids, and filters you need to fix it yourself and avoid the dealer wait times.
Field Prep and Safety Lockout for Real World Conditions
Before you even think about laying a wrench on this machine, we need to have a serious talk about safety. This isn't some climate-controlled dealer shop with overhead cranes and perfectly level floors. We're talking about doing this job in the real world—out in the dirt, mud, or on a gravel pad where one shortcut can get you crushed.
This is the part of the job where guys get complacent, and that’s how people die. Don't be that guy.
First thing's first: find the right spot to work. You need ground that’s as level and firm as you can possibly find. Any soft dirt or slight incline is just begging for a jack stand to kick out or the whole machine to shift on you. Once you’ve picked your spot, kill the engine, yank the parking brake, and chock those wheels—front and back. No excuses.
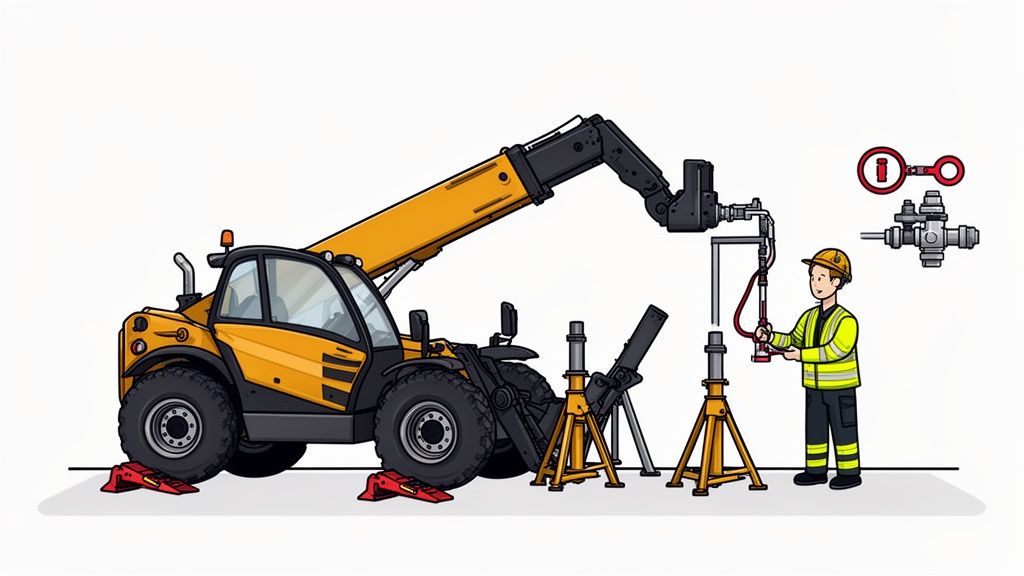
This image nails the kind of deliberate, safety-first setup we're after. The machine is stable and the boom is properly supported before the real work begins. That's the mindset you need when there are thousands of pounds of steel hanging over your head.
Supporting The Boom Correctly
This is where the real danger is. Don't even think about propping the boom up with another machine's forks; it’s an unstable setup just asking for trouble. You need heavy-duty, rated jack stands or solid wood cribbing, period. Extend the boom just enough to get to the wear pads you’re after, but no further. Keep it as stable as possible.
There’s a right way and a wrong way to place your supports:
- Main Boom Section: Brace this section as close to the chassis as you can. This is your foundation and stabilizes the whole assembly.
- Intermediate/Outer Sections: Your primary supports go directly under the section you're pulling pads from. This takes the weight off the retaining bolts and keeps that section from dropping when the old pads come out.
Never, ever work under a boom that's only held up by the machine's hydraulics. A hose can burst or a seal can fail in a split second, and that boom will come crashing down instantly. Always use physical, mechanical supports. This isn't a recommendation; it's a rule you live by.
Bleeding Off Hydraulic Pressure
With the boom securely supported, it's time to kill the hydraulic pressure. This step prevents a cylinder from drifting or moving if a control gets bumped.
Hop in the cab and turn the key to the 'on' position (don't start the engine). Now, work all the hydraulic controls back and forth—boom up/down, extend/retract, tilt, and any auxiliary functions.
You'll feel the levers go limp. That's your signal that the stored pressure is gone. Now, turn the key off, take it out of the ignition, and perform your lockout/tagout procedure. This is what keeps someone from trying to start the machine while you're underneath it.
Taking these steps seriously is what separates a professional technician from a statistic. For a more detailed breakdown, you can review essential guidelines for heavy equipment safety over at Flat Earth Equipment. It’s better to spend five extra minutes on lockout procedures than to spend the rest of your life wishing you had. This is how you stay alive to finish the job and get paid.
Getting the Right Tools and Parts You Can Trust
Forget what the dealer tells you about needing their special service tools and a pristine shop to do this job. That’s how they keep you waiting and paying. For a wear pad replacement, you need brute force, common sense, and the right iron in your service truck—not a laptop that tells you to start a "Regen" cycle that stops the machine dead.
This job is all about leverage and control. Don't show up with a half-inch cordless impact and expect to break loose bolts that have been torqued to spec and baked in grit for a thousand hours. You’re just going to burn out your tool and your patience.
Your Field-Ready Toolkit
Here’s a no-nonsense checklist of the tools you actually need to get this done out in the dirt. No fluff, just the essentials that will save you a trip back to the shop or, worse, a call to the dealer.
Essential Wear Pad Replacement Toolkit
A no-nonsense checklist of tools required for replacing JCB boom wear pads in the field. No dealer specials needed.
| Tool Category | Specific Tool | Pro-Tip for Field Use |
|---|---|---|
| Breaking & Tightening | 1-Inch Drive Impact Wrench (Air or High-Torque Cordless) | Those retaining bolts have seen it all. A smaller impact just won't cut it for breakaway torque. |
| Leverage | Torque Multiplier | For that one stubborn bolt that refuses to move, this tool saves you from snapping a breaker bar. |
| Persuasion | Long Pry Bars & a Sledgehammer | Old, compressed pads can get seriously wedged in the boom channels. This is how you convince them to come out. |
| Alignment | Tapered Drift Pins | Lining up new pads and bolt holes under tension is tricky. Drift pins make reassembly a hundred times easier. |
| Preparation | Brake Cleaner, Wire Brushes & Scraper | A clean mounting surface is non-negotiable. Get every last bit of caked-on grease and metal dust out of there. |
The biggest mistake I see guys make is not cleaning the mounting surfaces properly. They slap new pads on top of old grit and wonder why the boom chatters or the pads wear out in 500 hours. Take the extra ten minutes to get it clean. It's the cheapest insurance you can buy for this repair.
Sourcing Parts That Don’t Come with a Dealer Markup
Now for the most important part: getting the right wear pads without getting ripped off at the parts counter. This is where you take back control. Waiting a week for a part that’s sitting on a shelf somewhere else is just burning daylight and money.
For JCB Loadall telehandlers like the 505-20E or 510-44 series, the boom extension guide wear pad, specifically OEM part number 160/00991, is a common replacement. These pads are so essential that they're replaced in 70% of routine services to prevent serious slide rail damage.
Since the old Loadall 530S models came out in 1985, the technology has moved from basic plastic to advanced nylube composites that have cut wear rates by 50%. You can learn more about the history of this specific JCB part and how it fits into your machine over at Reliable Aftermarket Parts.
Understanding the difference in materials is key to making a smart purchase.
- Standard Polyethylene (PE): This is the basic, budget-friendly option. It works, but it wears faster, especially in abrasive, sandy conditions.
- Nylube Composites: These are the superior choice. They are self-lubricating, meaning less friction and a much longer service life. They cost a little more upfront but save you from doing this job twice.
This is exactly why I tell everyone to bypass the dealership and find a supplier who knows their iron. A reliable source like Flat Earth Equipment stocks the high-quality, precision-fit parts you need and can get them to you fast. They understand that downtime is the enemy and won’t make you wait for a part they should have on the shelf, ready to ship.
You get components that meet or exceed the OEM specs without the OEM price tag, and you get them now.
Getting Into the Boom and Replacing the Wear Pads
Alright, with the machine safely locked out and the boom properly supported, it's time to get your hands dirty. This is where the real work begins—methodically tearing into the boom to swap out those shot wear pads. This isn't a race. Patience and attention to detail here will save you a world of headaches when it's time to put everything back together.
First, with the boom extended just enough to access the pads you're targeting, you need to find the retaining bolts. Depending on your JCB model, these could be on the top, sides, or bottom of the boom sections. Get your biggest impact wrench ready, because these bolts are often seized with a nasty mix of rust, dirt, and hydraulic oil.
Don't be surprised if they put up a fight. A good dose of penetrating oil and some patience is your first move. If that fails, a little heat from a torch can help persuade a stubborn bolt, but be smart about it—keep an eye out for hydraulic lines and electrical wiring.
Yanking the Old Pads and Cleaning Up the Mess
Once you’ve broken the retaining bolts loose, back them out carefully. With the bolts gone, the old wear pad should be free. And "should be" is the key phrase. More often than not, a worn, compressed pad is wedged in its channel tighter than a drum. This is where your pry bars and a heavy hammer earn their keep.
Gently work the pad out from one side, being extra careful not to gouge the steel channel it sits in. Dealership techs often rush this part and score the mounting surface, which will just chew up your new pads faster. Take your time and work it out evenly.
Once the old pad is out, you're at the most critical step of the entire job: cleaning the mounting surface.
- Grab your scraper and get all the caked-on grease and grime out of the channel.
- Follow that up with a wire brush to remove any rust or stubborn debris.
- Finally, hit it with a blast of brake cleaner to get the surface perfectly clean and dry.
Any debris you leave behind acts like sandpaper. It creates a high spot that puts uneven pressure on the new pad, leading to premature failure and sending you right back here in a few hundred hours. A clean surface is non-negotiable for a lasting repair.
With the channel spotless, now is the perfect time to inspect it for damage. Run your hand along the inside of the boom sections and feel for deep gouges or cracks in the steel. Minor surface scoring is pretty normal, but deep grooves are a sign of bigger problems—a clear indicator the machine was run way too long with failed pads.
The Right Sequence for Installing New Pads
Getting the new pads installed isn't just about slapping them in and tightening the bolts. There’s a sequence that maintains proper boom alignment and makes your life a whole lot easier. You can't just replace all the bottom pads at once, or the boom section will drop and you'll never get the bolts lined up again.
The general rule is to work methodically, one area at a time, to keep the boom section centered.
- Start with the Top Pads: Replace these first. Gravity is on your side here, as the boom section is resting on the bottom and side pads, giving you plenty of clearance.
- Move to the Side Pads: Do one side, then the other. This keeps the section from shifting side-to-side.
- Finish with the Bottom Pads: These are the last to go in. You may need to use a pry bar to slightly lift the boom section to create just enough space to slide the new pad into place.
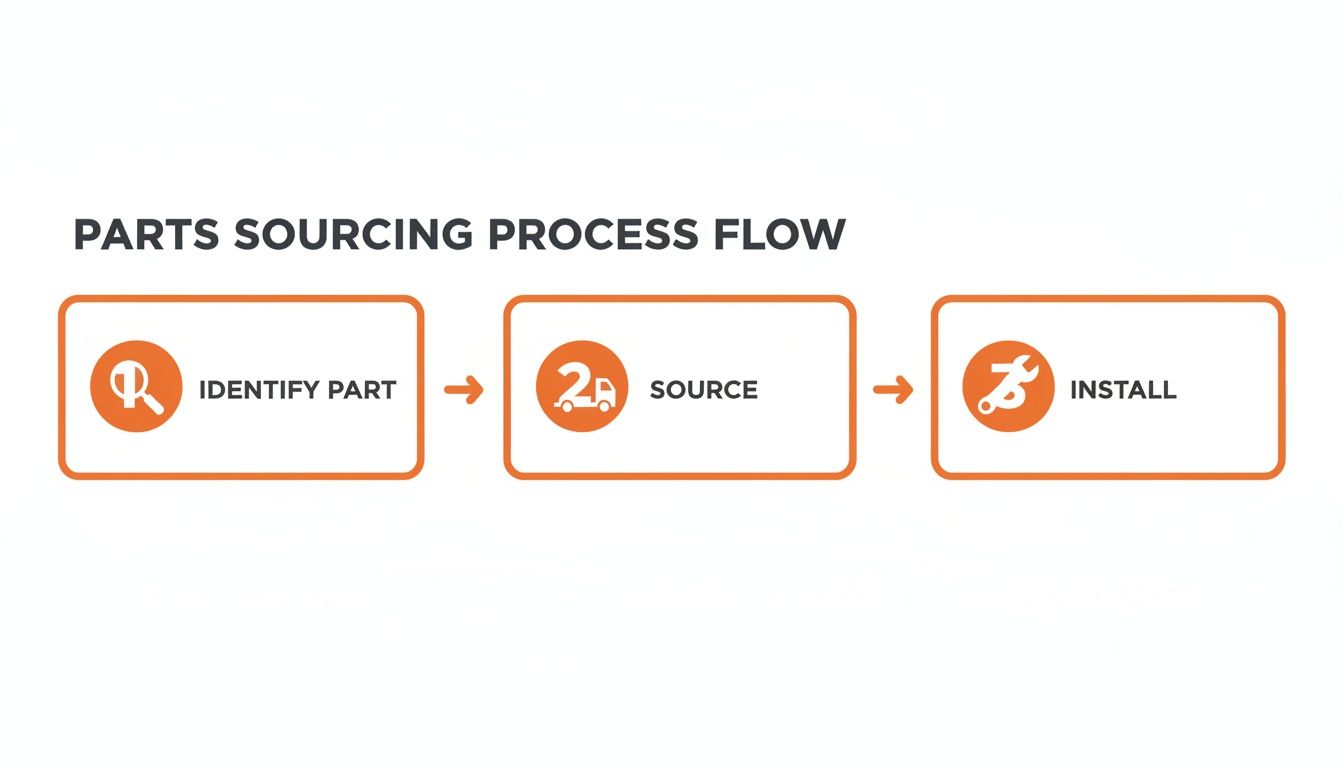
This process flow covers the core steps for any field repair, from identifying the part to getting it installed and back to work.
When inserting the new pads, they should be a snug fit. If a pad feels too loose, double-check your part number. If it’s too tight, resist the urge to hammer it in and first verify the channel is perfectly clean. A tapered drift pin is your best friend for lining up the bolt holes. Don't be afraid to manually slide the boom section back and forth an inch or two with a pry bar to get everything perfectly aligned before you start threading bolts.
Torque Specs: Why They’re Not a Suggestion
Finally, let’s talk torque. Every bolt on that machine has a specification for a reason, and on wear pad retainers, it’s especially important.
- Under-tightened bolts can back out from vibration, causing the pad to come loose and get destroyed in short order.
- Over-tightened bolts can warp the retaining plate, crush the new pad, and even strip the threads in the boom itself—creating a massive new problem.
Look up the correct torque specification for your specific JCB model. Don't guess. Use a calibrated torque wrench and tighten the bolts in a star pattern to ensure even pressure across the pad. This final detail is what separates a professional, long-lasting repair from a sloppy job that’s doomed to fail. It's the difference between fixing it right and fixing it again.
Getting the Boom Tracking Straight: Final Alignment and Checks
Slapping in new wear pads and calling it a day is a rookie move. The real work—the part that ensures this repair actually lasts—is getting that boom perfectly realigned. You’ve just put brand-new, full-thickness pads into a system that was running loose and worn. If you don't get it tracking dead straight, you'll grind those new pads into dust in no time.
This is where a lot of field techs, rushing to the next job, cut corners. They figure if the boom goes in and out without jamming, it's "good enough." We're not doing "good enough." We're doing it right so you don't have to tear into this thing again next season.
A misaligned boom is a pad-killer, plain and simple. The incredible force of the hydraulics will shove the steel boom sections against any tight spots, creating friction and heat. That chatter you hear when extending a worn boom? That's the sound of your wear pads being eaten alive.
Field Alignment: The Old-School Way
Forget lasers and digital levels. Out in the dirt, proper alignment comes down to feel, sight, and a methodical process. With your new pads in and the retaining bolts just snug—not fully torqued—it's time to see how things move.
Get a long pry bar and carefully work the boom sections in and out a few inches. You're feeling for any binding or tight spots. Does it glide smoothly, or does it hang up somewhere? That initial feel is your first clue to where the problems are.
Once you’re happy with how it moves by hand, it's time for the real test under hydraulic power.
- Remove the heavy-duty supports you had propping up the boom.
- Fire up the machine and let the hydraulic system come up to full pressure.
- Slowly cycle the boom through a full extension and retraction, at least three to five times.
Listen. You want to hear nothing but the hum of the hydraulics. Any grinding, squealing, or popping sounds mean something is out of alignment. A perfectly set up boom is a quiet boom.
Shims and the Final Torque: Locking It In
On certain JCB models, you'll find thin metal shims tucked behind the wear pad mounting plates. These aren't just spacers; they're your fine-tuning adjustment for alignment. If your machine had them, they must go back in exactly where they came from. If you're still feeling a consistent bind on one side, you might need to add or remove a shim to get the clearance just right. It can be a bit of trial and error, but it’s absolutely critical for a perfect fit.
After you've cycled the boom under its own power a few times, the new pads will have settled into their channels. Now it's time for the final torque. Go back over every single retaining bolt and torque them to the manufacturer's exact specification. Do not skip this. Those bolts will loosen up after the initial run-in period if you don't.
It's not just about getting it tight; it's about getting it right. This final torque sequence locks everything into its final, settled position, ensuring the alignment you just worked so hard to achieve actually holds under load.
A Quick Word on Grease
Here’s a tip that separates the pros from the guys who are always breaking stuff: grease the boom after the job is done, not before or during. Smearing grease into the channels before installing the pads just turns it into a magnet for all the dirt, grit, and metal shavings flying around during the repair. You'll just be grinding that abrasive paste into your brand-new pads from the very first cycle.
Once everything is aligned, torqued, and tested, apply a thin coat of the recommended boom lubricant to the sliding surfaces. This protects the steel sections and helps the new pads break in smoothly. Worn pads are the root cause of 40% of all boom misalignments, leading to a 12% drop in productivity. Getting this alignment perfect after a pad swap can boost your machine's efficiency by as much as 25%. You can learn more about how JCB part design impacts these repairs.
This final process is your guarantee. You haven't just replaced worn-out parts; you've restored the machine's precision, making sure it runs smoothly and keeps you far away from the dealer's shop.
Common Questions from the Field
Out on a job site, you run into the same problems and questions over and over. Forget the textbook answers from the dealer's manual. Here are the straight, no-nonsense answers to the questions I get asked most often when it comes to replacing JCB telehandler wear pads.
This is practical advice, not corporate fluff. Let's clear the air so you can get back to work with confidence.
How Often Should I Replace My JCB Wear Pads?
There's no magic number printed on a maintenance schedule that works for every machine. The real answer? It depends entirely on how you run your iron. A telehandler lifting heavy pallets of block all day in a sandy, abrasive environment is going to eat pads for lunch compared to a machine doing light-duty farm work.
Your best tools are your own eyes and ears. The machine's condition is your guide, not the hour meter.
- Inspect every 500 hours: Get in there and do a thorough visual check. Look for excessive boom play, check for fresh metal shavings around the boom sections, and get a feel for how much slop is in the system.
- Plan for replacement around 1000-2000 hours: This is a general ballpark. If your machine works hard, expect to be on the lower end of that range. If it's used intermittently, you might get more hours out of a set.
The second you hear that tell-tale grinding or feel the boom chatter, the clock is ticking. Don't wait. The pads are already gone, and every cycle is damaging the steel boom itself. A proactive inspection saves you from a reactive disaster.
Can I Replace Just One Worn Pad?
Technically, you can. But it's a terrible idea—a classic shortcut that will cost you more in the long run. If one pad is worn out, you can bet the others are right behind it. They've all been subjected to the same loads and the same number of cycles.
Think of it like putting one new tire on a car with three bald ones. The new pad will be thicker and firmer, creating uneven pressure points across the entire boom. This forces that single new pad to take on a disproportionate amount of the load, guaranteeing its own premature failure while accelerating wear on the boom channels.
Do the job right, do it once. Always replace them as a complete set. This is the only way to ensure the boom is properly aligned, supported on all sides, and ready for another thousand hours of work.
What's the Biggest Mistake People Make During This Repair?
The most common—and by far the most dangerous—mistake I see is inadequate support of the boom sections before disassembly. Guys get in a hurry, get complacent, and prop the boom up with a forklift or the bucket of another loader. This is an incredibly unstable setup. All it takes is one hydraulic leak or a slight shift in the ground for that boom to move, and it won't stop for anything or anyone.
The second biggest mistake is failing to properly clean the boom channels and mounting surfaces. Any leftover grease, caked-on dirt, or metal shavings will act like sandpaper under the new pads, preventing them from seating correctly. This leads directly to the alignment issues and rapid wear we've been talking about.
If you have unique questions about a specific model or a particularly stubborn repair, it’s always better to ask someone who’s been there. For those tougher situations, you can always contact the technicians at Flat Earth Equipment for some real-world advice. Taking a few minutes to ask a question is a lot cheaper than redoing the entire job.
When your JCB telehandler is down, every minute spent waiting for parts is money lost. Forget the dealership runaround and the "we can have it in a week" excuses. At Flat Earth Equipment, we stock the high-quality, precision-fit wear pads you need and ship them the same day, getting your iron back in the dirt where it belongs.