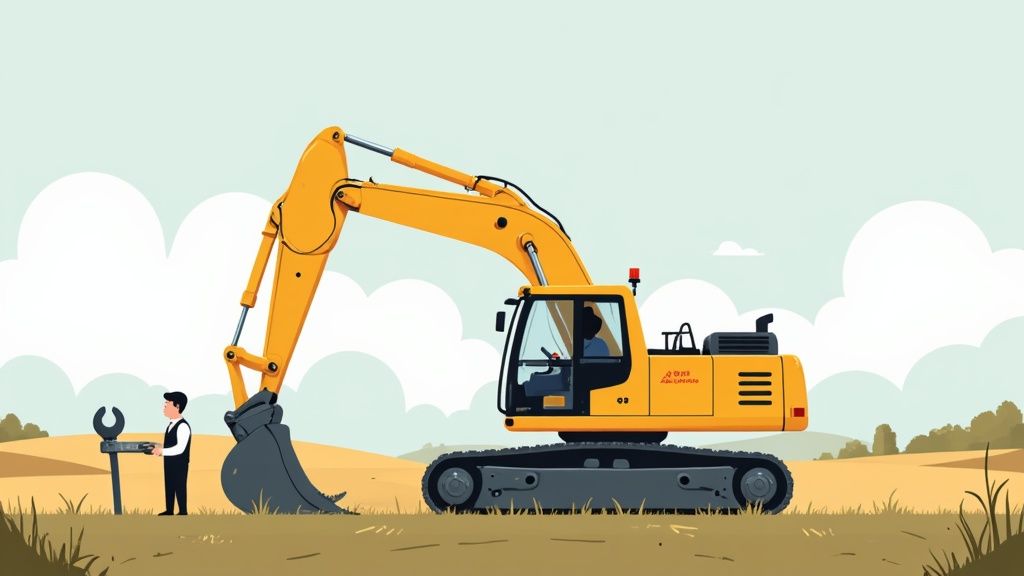
When your JCB starts throwing codes and crawling in limp mode, every second of downtime is burning a hole in your pocket. This guide is all about getting you back to making money. We're going to show you how to perform a JCB Excavator Throttle Motor Calibration yourself—bypassing the dealer and their sacred laptop. We'll walk you through diagnosing the problem and fixing it right in the field, where the work gets done.
Why Your JCB Is Limping and How to Fix It
Let's be real: when your machine bogs down, throwing fits with erratic RPMs and a throttle that feels like it's stuck in mud, the dealer's first move is always the same. "Haul it in," they'll say, ready to plug in their proprietary Service Master laptop and hand you a bill that'll make your eyes water.
But here's the dirt—more often than not, the culprit is something you can fix with a handful of tools and some common sense.
You're burning cash every hour that yellow iron sits idle. The last thing you need is to be held hostage by a service department's schedule, especially when the root cause is often just a throttle motor that’s lost its mind. These JCB electronics, particularly the emissions garbage like AdBlue and DEF systems, are notoriously finicky. A slight voltage dip or a sticky linkage can send the ECU into a panic, triggering limp mode or a forced regen cycle that stops you dead in your tracks.
Spotting the Real Problem
Before you start tearing into the engine bay, you need to know what you’re looking for. A miscalibrated throttle motor acts a certain way, and learning to read the signs is the first step to beating the dealer at their own game.
Here are the classic symptoms that scream "calibration issue":
- Engine RPMs Don't Match the Dial: You turn the throttle knob, but the engine response is delayed, jumpy, or just plain wrong.
- Hunting for Idle: The engine speed wanders up and down at low idle, never quite settling in. It's annoying and a sign of trouble.
- Sudden Limp Mode: The machine throws a fault code and cuts power without any obvious mechanical failure. It just decides it's had enough.
- No High Idle: You can't get the machine to full power, no matter how far you crank the dial.
You know your machine better than anyone. If it feels "off" and the hydraulics seem weak or slow, don't immediately assume the pump is failing. A confused throttle motor can starve the entire system of the RPMs it needs to build proper pressure.
The goal here is to confidently distinguish between an electronic hiccup and a genuinely failed part. Just throwing a new motor at the problem without a proper diagnosis is as bad as hauling it to the dealer—it's wasted time and money.
Calibration Glitch Or Total Failure
This whole process has become more critical as engines get more complex. Take JCB's EcoMAX engines, for example. They achieve a 15% reduction in fuel use through precise electronic control. In an excavator market valued at over USD 60.7 billion in 2023, that efficiency matters. But it also means the systems are way more sensitive to calibration errors. You can find more insights into the construction equipment market and its growth drivers on sphericalinsights.com.
Use this field guide to quickly determine if you're dealing with a calibration problem or a dead motor before you start turning wrenches.
| Symptom | Likely Calibration Issue | Likely Motor Failure |
|---|---|---|
| Erratic RPMs | Engine speed is inconsistent and doesn't match the throttle setting. | The motor often buzzes or makes clicking noises with no change in RPM. |
| No Throttle Response | The engine stays at a fixed idle, ignoring all throttle input. | Complete silence from the motor; it's dead to the world. |
| Intermittent Faults | The issue comes and goes, often triggered by vibration or temperature changes. | The fault code is constant and cannot be cleared. |
| Sticking at High/Low Idle | The engine gets stuck at one end of the RPM range. | You can physically feel grinding or binding when moving the linkage by hand (engine off). |
This guide is your first line of defense. It's about empowering you to take control, diagnose the problem on your own terms, and get the parts you need—like a new sensor or solenoid from Flat Earth Equipment—without waiting for the dealer's permission.
Now, let's get that yellow iron back to making you money.
Field Diagnostics: What to Check Before You Calibrate
Before you even think about touching a wrench or plugging in a scan tool, you need to do some old-fashioned detective work. Just slapping a new throttle motor on is a great way to waste time and money. We need to figure out what the machine is actually telling us, right here in the field, without needing the dealer's expensive laptop.
Your first clue is usually right in front of you on the dash display. Most JCB excavators will throw a fault code when the ECU isn't happy. Don't blow these off. These codes are the machine’s way of pointing you right to the problem. Write them down and figure out what they mean before you do anything else. You might get lucky and see a code pointing directly to a throttle position sensor, or it could be something completely different.
What to Look for Before You Grab a Wrench
Once you have any codes, it's time for a thorough visual inspection. You'd be amazed how many "electrical" problems are really just mechanical issues in disguise. Pop the engine cover and get a good look at the throttle motor and all its moving parts.
Here's what I always check first:
- The Linkage: Is it bent, binding up, or just packed with dirt and grease? A stiff or damaged linkage will fight the motor constantly, making a proper calibration impossible.
- The Wiring Harness: Carefully trace the wires coming from the motor. Look for any spots where it's been rubbing against hot exhaust parts or sharp metal edges. A single frayed wire can cause intermittent faults that will drive you absolutely crazy.
- Loose Connections: Get your hand on the main connector at the throttle motor and give it a firm wiggle. A loose pin or a bit of corrosion is a classic reason for the ECU getting erratic signals.
This isn't just busy work; you're ruling out the simple stuff first. Taking five minutes to do this can save you hours of frustration down the road.
Don't just look—get your hands on it. With the key off, move the throttle linkage by hand through its full range of motion. Feel for any hitches, grinding, or tight spots. It should move smoothly from the low idle stop all the way to high idle.
Breaking Out the Multimeter
If everything looks good visually, it's time to confirm the electrical side of the equation. This is where a simple multimeter becomes your most valuable tool. No fancy scanner needed, just a meter that can read voltage and continuity.
You're going to test the connector that plugs into the throttle motor itself. Unplug it, then turn the key to the 'on' position (but don't start the engine). We need to verify that the ECU is sending the right signals down the line. You'll typically find pins for power, ground, and at least one signal wire that tells the motor where to go.
A service manual will have the exact pinouts and voltage specs, but you're generally looking for a steady 5-volt reference signal and a solid ground. If you don't have that 5V reference, the problem isn't your throttle motor. The issue is upstream—maybe the ECU itself or another sensor on the same circuit. This one check prevents you from replacing a perfectly good part. This is the kind of methodical troubleshooting that separates a real technician from a parts changer.
The Manual Throttle Calibration Procedure
Alright, let's get our hands dirty. This is where we stop diagnosing and start fixing. The dealer wants you to believe this is some dark art that only their blessed Service Master laptop can perform. That’s pure nonsense. This is just a mechanical and electrical handshake, and you can force the introduction right here in the dirt.
We're going to walk through the manual calibration that works on a huge range of common JCB excavators you'll find on-site. The goal is simple: teach the machine's brain (the ECU) the physical start and end points of the throttle motor. You're setting the boundaries so it knows what "zero" and "full throttle" actually mean.
Getting this right ensures your machine isn’t constantly fighting itself—a common cause for those phantom fault codes and limp mode events that plague JCBs with their sensitive electronics. Before you touch a single wrench, make sure you've already done your homework.
This simple process flow covers the essential checks you should have already nailed before even thinking about a manual calibration.
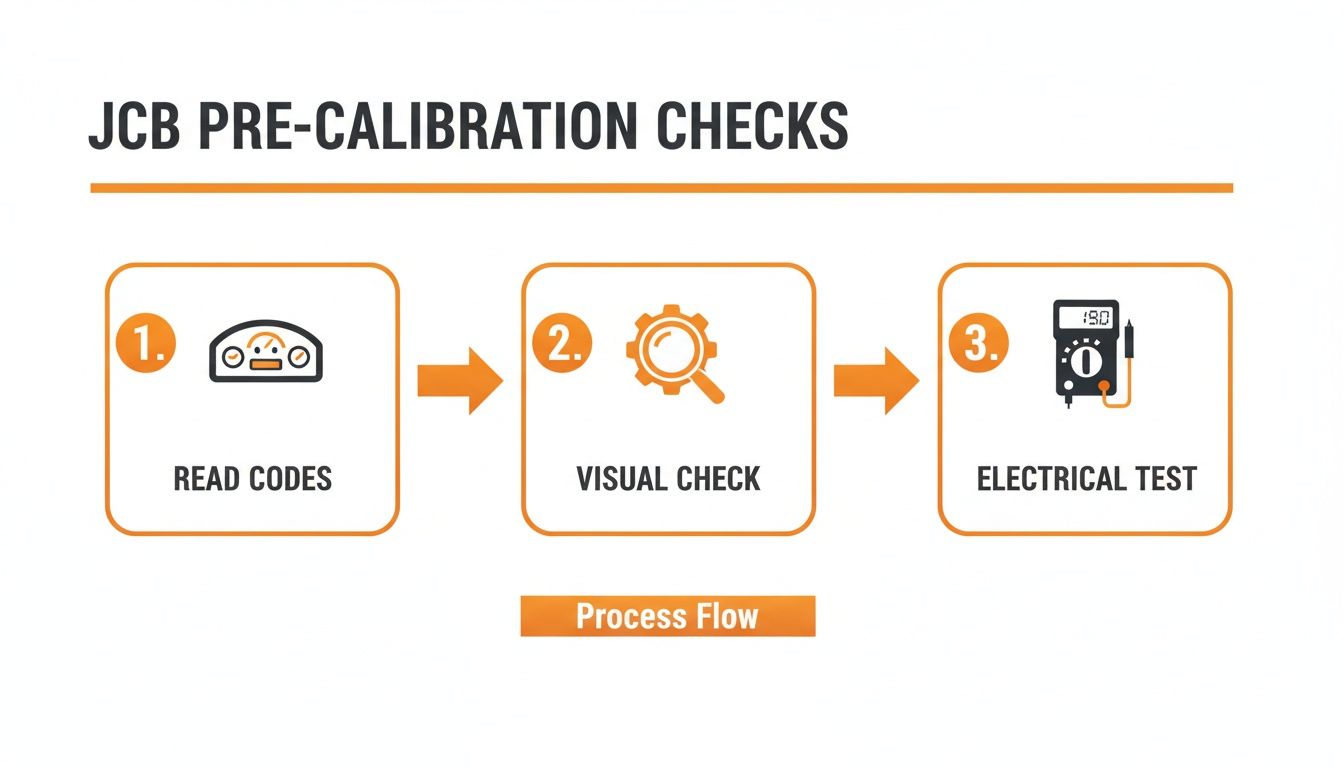
This workflow—reading codes, visual checks, and electrical tests—is your foundation. It stops you from wasting time trying to calibrate a part that was doomed from the start.
Accessing the Throttle Assembly
First thing's first: you need to get eyes on the throttle motor and its linkage. On most JCB excavators, it’s mounted right near the injection pump. You'll likely need to pull a side panel or two, so have your basic socket set handy. Don't rush this part; busted plastic clips and lost bolts are just rookie mistakes that slow you down.
Once you have a clear view, you need to spot the key players:
- The Throttle Motor: That black box with the wiring harness plugged into it.
- The Linkage Rod: The adjustable rod connecting the motor's arm to the injection pump lever.
- The Stop Screws: You'll see two of them, usually with a lock nut. One sets the low idle (minimum) position, and the other sets the high idle (maximum) position. These are your most important adjustment points.
Before you loosen a single bolt, snap a picture with your phone. It's cheap insurance, giving you a perfect "before" picture if things go sideways.
Setting the Physical Travel Limits
This is the most critical mechanical step of the whole job. With the key OFF, pop the linkage rod off the injection pump lever. This lets you move the pump lever by hand without fighting the throttle motor.
Push the pump lever all the way back to its absolute minimum fuel position. This is your true low idle stop. Now, adjust the low idle stop screw so it just barely touches the lever in this position. The goal is to create a solid physical stop. Once it's set, snug up the lock nut so vibration doesn't back it off.
Next, do the exact same thing for the high idle. Push the pump lever all the way forward to its maximum fuel position. Adjust the high idle stop screw to meet the lever at that exact point and lock it down. You've just established the hard mechanical limits for the fuel system.
Don't get sloppy here. If your stop screws are set wrong, you’re either leaving power on the table by not allowing full travel, or you're telling the ECU a range that’s physically impossible, which will just throw another code. Precision matters.
Now, reconnect the linkage rod. You may need to adjust its length so it connects smoothly to the pump lever without pushing or pulling it off that low idle stop screw you just set. The motor should be at rest, and the pump should be at rest.
Forcing the ECU to Re-Learn
Now for the "magic" the dealer doesn't want you to know about. The ECU is still thinking about the old calibration data. We need to force it to wipe that memory and learn the new physical limits you just set with those stop screws.
This is often called the "key-on, engine-off" method. It’s a simple but powerful electronic handshake that requires zero special tools.
- Check Your Cab: Make sure all controls are neutral and the key is completely off.
- Key to ON: Turn the key to the 'on' position but DO NOT START THE ENGINE.
- Cycle the Throttle Dial: Slowly and deliberately, turn the throttle control knob inside the cab from its lowest setting all the way to its highest setting. Pause for a second at the top. Then, slowly turn it all the way back down to the lowest setting.
- Wait and Listen: You should hear the throttle motor whirring as it moves the linkage from your new low idle stop to your new high idle stop. It's physically feeling for those hard stops you just set.
- Repeat the Cycle: Do this full throttle sweep two or three more times. This repetition is what drills the new high and low voltage readings into the ECU's permanent memory.
- Key OFF: Turn the key off and wait about 30 seconds. This gives the ECU time to save the new values.
On some newer or different JCB models, you might have to kick off this learning cycle through the monitor's service menu. But for a huge range of machines out there, the manual key-on, engine-off procedure works like a charm.
Once you’re done, fire up the engine. The idle should sound more stable, and the throttle response should feel crisp and immediate. Run it through the RPM range and listen. If it’s smooth, you’ve just saved yourself a four-figure dealer bill. If it's still acting up, don't panic—our next section covers troubleshooting the headaches that can pop up.
Troubleshooting Common Calibration Headaches
You did everything by the book. You set the stop screws, you did the key-on dance, but your JCB is still throwing a fit. Don't throw your wrench across the yard just yet.
When a calibration doesn’t stick, it’s almost never the procedure’s fault. It’s a classic sign that there’s a ghost in the machine you need to exorcise.
This is where the real work begins—hunting down the subtle gremlins that fool the ECU. The dealer’s first move is often to plug in their laptop and start swapping parts on your dime. Our approach? Use our head and a multimeter to find the real problem.
Most of the time, a failed calibration is pointing to an electrical issue that’s just deep enough to hide from a quick visual check.
When the Fault Code Comes Right Back
The most frustrating scenario is clearing a code, firing up the engine, and watching it pop right back up. If the ECU won't accept the new calibration, it means the information it's getting still doesn't make sense.
Here’s where to start digging:
- Weak Battery Voltage: Did you check the battery? An ECU learning cycle pulls a decent bit of current. If your battery is old or weak, the voltage can dip just enough during the key-on procedure to corrupt the data. It might read a healthy 12.6 volts at rest but sag to 10 volts when the electronics wake up. That’s enough to cause chaos.
- Hidden Wire Breaks: A multimeter might show good continuity with the harness sitting still, but that can be misleading. Start wiggling the harness from the throttle motor back toward the main loom while you have the meter connected. A wire can be broken internally but still make contact until vibration or movement separates it.
- Grounding Issues: Bad grounds are the root of all evil in JCB electronics. Find the main engine-to-frame ground strap. Is it clean, tight, and free of rust or grease? A poor ground forces the system to find other, less reliable paths, creating electrical noise that scrambles sensor signals.
You’re not just calibrating a motor; you’re trying to give the ECU clean, reliable data. If the electrical foundation is shaky, no amount of adjustment will ever stick. It’s like trying to build a house on quicksand.
Chasing Engine RPM Problems
What if the calibration seemed to work, but now the engine is acting strange? Maybe it’s hunting for a steady idle, or it revs up way too high the second you touch the dial. This usually points to a mechanical or air-related issue that’s tricking the system.
Before you redo the entire calibration, check these culprits:
- Vacuum Leaks: A cracked or disconnected vacuum line can let unmetered air into the intake, causing the engine to surge or idle high. The ECU sees the high RPM and tries to close the throttle, but it's fighting a battle it can't win.
- Stop Screw Fine-Tuning: You might have set the screws perfectly based on the pump lever's travel, but the engine itself might want something slightly different. If the idle is too low and rough, back the low idle screw out just a fraction of a turn. If it's idling too high, turn it in a hair. These tiny tweaks make a huge difference.
The excavator market has seen a rapid evolution, with more advanced electronic controls on everything. JCB, alongside giants like Caterpillar and Komatsu, is constantly tweaking these systems for better efficiency and emissions. This makes throttle motor calibration more critical than ever. You can read more about the competitive excavator market landscape on mordorintelligence.com.
When you’re troubleshooting these headaches, remember that you’re smarter than the machine. The ECU is just a box following orders. If its orders are based on bad information, you’ll get bad results. Your job is to find that bad piece of information and fix it at the source.
Calibration Fault Finder
When a calibration fails, it leaves clues. This table helps you connect the symptom to the likely culprit so you can get straight to the real problem without wasting time.
| Problem After Calibration | Primary Suspect | Secondary Check |
|---|---|---|
| Code immediately returns | Electrical Interference | Bad ground, weak battery, or internal wire break in the harness. |
| Engine hunts for idle | Vacuum Leak | Cracked or disconnected vacuum line introducing unmetered air. |
| RPMs too high or low | Stop Screw Adjustment | The mechanical stop screws need a slight fine-tuning adjustment. |
| No response from motor | No Power/Signal | Check for 12V power and signal at the motor connector pins. |
Think of this as your starting point. The machine is telling you what's wrong; you just need to know how to interpret its language.
When to Stop Calibrating and Start Replacing
You can tweak and adjust all day long, but you can't calibrate a dead part. Knowing when to stop turning wrenches and start ordering a replacement is the difference between a quick fix and an entire day wasted chasing ghosts in the machine.
Sometimes the signs are subtle, but they're always there if you know what to look for. The calibration just won't "stick," the RPMs drift for no reason, or you start getting intermittent fault codes that make absolutely no sense. This isn't the ECU being difficult; it's the motor screaming for help.
Definitive Signs of a Failed Motor
If you run into any of these symptoms, put the tools down. It's time for a new motor.
- Erratic Position Signals: This usually means the internal position sensor is shot. It's feeding garbage data back to the ECU, causing the engine to hunt and surge. No amount of calibration can fix a sensor that's lying about its position.
- Failed Voltage Test: The simplest check is often the most revealing. Unplug the motor and carefully apply direct 12V power to the motor pins. If it doesn't move smoothly and consistently through its full range of motion, it's burnt out. End of story.
- Grinding or Binding: If you can hear or feel the internal gears grinding, it's game over. The plastic gears inside these units wear down, especially after years of vibration and punishing heat cycles.
Don't let a dead motor trick you into thinking you've got a bigger ECU or wiring nightmare on your hands. When in doubt, a direct voltage test at the motor connector is the quickest way to get a confession. It either works, or it's junk.
This all matters because the machinery world isn't getting any simpler. The compact construction equipment market is projected to hit USD 48.4 billion by 2035. With JCB and its main competitors holding about 35% of that market, the push for efficiency means more electronics and tighter tolerances. That's why knowing a simple calibration from a failed part is so critical for any tech in the field.
Sourcing Parts the Smart Way
Once you’ve confirmed the motor is shot, the dealer will be happy to sell you their official OEM part—in a fancy box with a ridiculous markup. You’ll pay a premium for the brand name and then wait for them to get it in stock.
There's a better way.
High-quality aftermarket alternatives deliver the same reliable performance without the "dealer tax." Suppliers like us at Flat Earth Equipment stock the parts you actually need to get the machine back up and running. We know downtime costs you money, so we focus on getting you a reliable motor that fits, works, and ships fast.
Don't let a simple component failure turn into a week of waiting and a massive bill. Make the right diagnosis, source the right part, and get the job done.
Your Field Guide to JCB Throttle Motor Questions
Out in the field, you run into the same problems over and over. Here are some straight answers to the questions we get all the time from guys trying to wrestle with a JCB excavator throttle motor calibration. This is no-nonsense advice for the real world, not the stuff you'll find in a clean-room service manual.
Can I Perform the Calibration Without the Dealer Laptop?
Absolutely. That's the whole point of this guide. The dealer wants you to believe their Service Master laptop is magic, but for a huge number of JCB models, the "key-on, engine-off" procedure we covered is all you need.
You're just manually teaching the ECU the physical limits of the throttle travel. Don't let them intimidate you; the system is simpler than they want you to think. Their goal is to get you to haul the machine to their shop so they can charge you shop rates for a 15-minute job.
Why Does My JCB Keep Losing Its Calibration?
If you have to recalibrate the throttle motor every few weeks or months, you're not fixing the root problem. A solid calibration should hold indefinitely unless a part fails.
Constant loss of calibration almost always points to one of these culprits:
- A Weak Battery: This is the number one cause. Low voltage during startup scrambles the ECU's memory.
- A Bad Ground: The second most common reason. Electrical noise from a poor ground connection corrupts the signal.
- Vibration Damage: A failing motor mount or excessive engine vibration can slowly shake the throttle motor's internal sensor to death.
Think of it like this: if you have to keep resetting your watch, you don't blame the watch—you check the battery. The same logic applies here. Stop treating the symptom and find the real electrical gremlin.
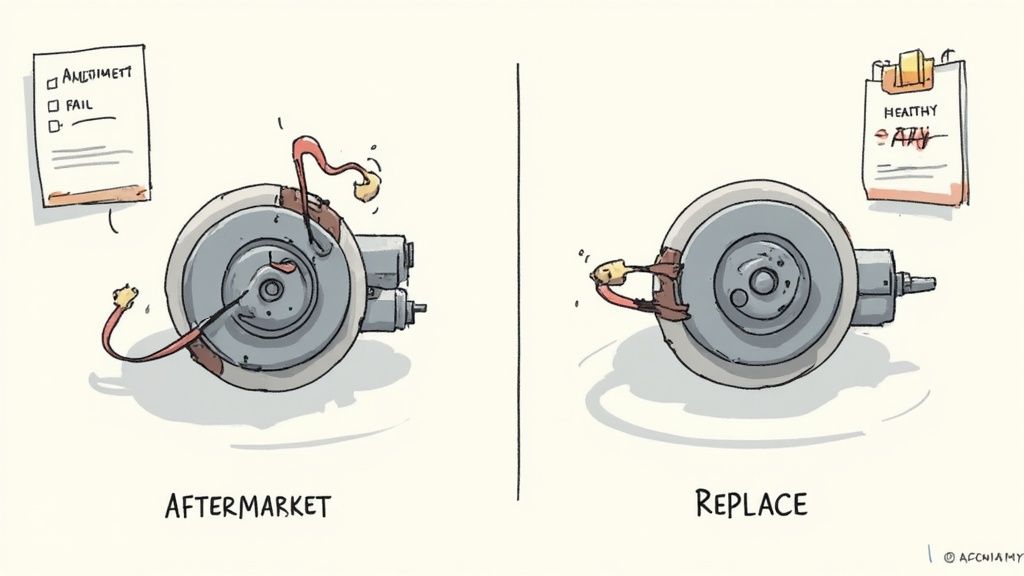
Is an Aftermarket Throttle Motor Reliable?
The dealer will tell you that anything but their genuine OEM part is junk that will fail in a week. That’s a sales tactic, plain and simple.
A high-quality aftermarket motor from a reputable source is just as reliable as the original, often for a fraction of the cost. The key is knowing who you're buying from. We started this business because we were tired of the dealer runaround, and you can learn more about our commitment to providing solid, field-tested parts.
The goal is to get you a part that fits right, works right, and gets your machine earning again without the dealer markup.
What if the Throttle Is Unresponsive After Calibration?
If you've performed the calibration and the throttle is completely dead, it's time to go back to basics. The calibration procedure itself won't kill a working motor.
First, re-check your connections. Is the main harness plug seated correctly? Did you accidentally pinch a wire when putting a panel back on?
Next, use your multimeter to verify you have both 12V power and a good ground at the connector with the key on. If you have power and ground but the motor won't move when you cycle the throttle dial, the motor itself has likely failed internally. It happens. The good news is you've just definitively diagnosed it yourself, saving hours of guesswork.
When the diagnosis points to a dead part, skip the dealer's parts counter. Flat Earth Equipment has the throttle motors, sensors, and solenoids you need, in stock and ready to ship, so you can finish the job and get back to work. Get the right part without the wait at https://flatearthequipment.com.