When your JCB 3CX throws a fit—limp mode, a dashboard lit up like a Christmas tree, or another failed regen cycle that shuts you down—the dealer’s first move is to hook up their laptop and blame a pricey ECU or sensor.
But hold on. Before you authorize a four-figure repair that might not even fix it, you need to know about the real enemy, a simple problem lurking right under your floorboards: electrical connector corrosion. This green cancer creeping into the main harness is the true source of countless electrical gremlins that can shut your machine down cold.
Diagnosing the Gremlin Under Your Floorboards
Forget the dealer’s laptop and their usual song and dance. We're going straight to the source of at least 90% of your 3CX electrical nightmares. The problem almost always tracks back to the main interconnect harness, specifically that big, round, twist-lock connector joining the engine harness to the chassis harness. It lives in the worst possible spot, constantly getting blasted with mud, road salt, and vibration.
This isn't just a theory; it's what I see in the field every damn day. Moisture is the number one killer. It slowly wicks its way past the seals, gets trapped inside the connector housing, and starts eating away at the delicate pins and terminals. The result? A mess of intermittent signals, voltage drops, and total communication failures between critical systems—especially the finicky AdBlue/DEF and emissions gear.
The Real Culprit: The Engine-to-Chassis Connector
We're talking about a large, multi-pin unit, often with as many as 29 individual pins. It’s supposed to be sealed, but years of heat cycles, pressure washing, and just plain rattling around will compromise its integrity. Once water gets in, it’s the perfect storm for galvanic corrosion, especially when you add road salt or farm chemicals to the mix.
Field Note: The symptoms rarely point you straight to a bad connector. You'll get codes for a faulty AdBlue/DEF sensor, a transmission solenoid error, or a DPF pressure sensor failure. The dealer will happily sell you those parts, but the problem will be back in a week because the root cause—the corroded connection—was never fixed. They get paid either way.
Don't just take my word for it. A detailed case study highlighted severe water ingress in this exact engine-to-chassis harness. Even though it's an IP69-rated connector, moisture finds its way through the glands and housing, corroding multiple pins and causing a slow-motion failure. By 2018, service engineers reported this degradation was forcing expensive replacements of entire loom sections, with repair costs often topping $1,200 per incident. You can get the full story by reviewing these JCB connector grease case study insights.
Before you get stuck chasing ghosts with a scan tool, it's worth knowing how the machine's own diagnostics can lead you astray. The fault codes rarely tell the whole story.
Common Fault Codes vs. The Real Under-Cab Cause
Here’s a quick cross-reference I've put together from countless jobs. It shows how innocent-looking fault codes are often just symptoms of that one corroded connector.
| Fault Code on Dash | What the Dealer Tells You | The Likely Under-Cab Culprit |
|---|---|---|
| P20EE - SCR NOx Catalyst Efficiency Low | "You need a new NOx sensor or SCR catalyst." | A corroded pin for the NOx sensor is sending bad data. |
| U0100 - Lost Communication With ECM/PCM | "The main engine ECU is probably fried." | The CAN bus communication pins in the connector are corroded. |
| P0562 - System Voltage Low | "Your alternator is failing or you have bad batteries." | High resistance from corrosion is causing a voltage drop. |
| P2453 - DPF Pressure Sensor 'A' Circuit | "The DPF pressure sensor has failed." | Moisture in the connector is shorting the sensor's signal wire. |
Seeing these codes should make that under-cab connector your first suspect, not your last. This simple check can save you from replacing perfectly good—and expensive—components.
Early Warning Signs You Can't Ignore
Long before your machine grinds to a halt, it will drop hints. Catching these early can save you a world of hurt, not to mention a massive tow bill.
- Intermittent Faults: A warning light flashes on, then disappears after you hit a bump? That’s the textbook sign of a loose or corroded connection making and breaking contact.
- Flickering Lights: Dash lights, work lights, or even headlights that flicker randomly often point to a poor ground or an unstable power supply, frequently caused by corrosion in a main harness.
- Slow or Failed Cranking: If you know the batteries are good but the machine is sluggish to turn over, a high-resistance connection could be stealing the amperage the starter motor needs to do its job.
- Failed Regen Cycles: The emissions system is extremely sensitive. A single corroded pin for a temperature or pressure sensor is all it takes to stop a regen in its tracks, which will eventually force the machine into limp mode. That’s the machine-killer right there.
Don’t ignore these clues. The moment you see these symptoms, make that big connector under the cab your primary suspect. Getting to it before it fails completely is the difference between a few hours of work and a week of downtime.
Assembling Your Field Repair Toolkit
Walking into an electrical diagnostic job unprepared is a good way to turn a few hours of work into a week-long ordeal that ends with a tow bill. Forget the shiny, oversized toolbox; you need the right gear that actually works out in the mud and grease. Having the correct kit means you're driving home tonight. Bringing the wrong stuff is a guarantee you’ll be calling for a lowboy to haul that machine to the very dealer you're trying to avoid.
First things first, let's talk safety. This isn't just about avoiding a shock—it's about not creating new, expensive problems. The ECUs on these machines are incredibly sensitive to voltage spikes.
Before you even think about touching a wire, you need to perform a proper battery disconnect. Don't just yank the negative terminal off. Turn the machine completely off, pull the key, and then wait a full two minutes. This gives all the capacitors in the various control modules time to fully discharge. Then you can safely disconnect the negative battery cable. This simple bit of patience prevents voltage surges that can fry an ECU or trigger a whole new set of fault codes.
Tools for the Trenches
Now, let's get into the hardware. Your average automotive toolset isn't going to cut it here. We're dealing with stubborn, sealed industrial connectors, and you need tools built specifically for the job.
- A Quality Multimeter: A cheap meter that gives you ghost readings is worse than no meter at all. You need one with sharp, fine-point probes that can back-probe a connector without tearing up the weather seals. We're looking for real-world voltage drops, not just a simple beep for continuity.
- Terminal Pin Removal Tools: I can't stress this enough: do not try to use a paperclip or a pocket screwdriver. You will absolutely destroy the connector housing or the terminal's internal lock. Get a proper set of Deutsch and Amphenol pin removal tools. They’re designed to release the tiny locking tangs without collateral damage, which is a critical step for a successful JCB 3CX electrical connector corrosion fix.
- Wire Strippers and Crimpers: A good ratcheting crimper is non-negotiable. You need one that creates a solid, factory-style indent crimp every time. Just squeezing a terminal with pliers is asking for a future failure point right where you just "fixed" it.
You're not just patching a wire; you're rebuilding a critical data link. A bad crimp introduces resistance, and that resistance will throw off sensor readings just as effectively as the corrosion you're cleaning out. Do it right the first time, or you'll be doing it again next season.
Chemicals That Actually Work
Using the wrong chemicals is just as bad as using the wrong tools. Brake cleaner is for brakes—it will make plastic connectors brittle and completely destroy the delicate rubber seals. Grab the right cans for the job.
- Electrical Contact Cleaner: Make sure you get a can of plastic-safe, zero-residue cleaner. This stuff is specifically designed to blast out the green crust and evaporate completely, leaving no film behind to attract more dirt and moisture.
- Corrosion Inhibitor/Dielectric Grease: This is your final and most important line of defense against future problems. A quality dielectric grease doesn't just block moisture; it fills the microscopic air gaps around the terminal pins, preventing oxidation from ever getting a foothold again. Don't be shy with it. Coat the pins and fill the connector cavities before you seal everything back up. This is the step that keeps you from having to repeat this same miserable, under-the-cab fix next year.
Executing the Under-Cab Connector Repair
Alright, let's get our hands dirty. This is where the real work begins—turning a dead machine back into a moneymaker. Forget the theories; this is a boots-on-the-ground guide to fixing that notorious under-cab connector on your JCB 3CX, based on years of doing this exact job in the dirt and mud. We'll tackle this methodically so you don't end up creating new problems while trying to solve the old ones.
First things first: safety. This isn't just a suggestion; it's what keeps you out of the hospital and your machine's ECU out of the scrap heap. Before you even think about touching a wire, perform a full battery disconnect. We always hammer this home in our equipment safety guides: after turning off the key, give the machine's modules a solid two minutes to fully power down. This simple pause prevents voltage spikes that can instantly fry sensitive electronics, turning a simple connector job into an absolute nightmare.
Once the battery is safely disconnected, get under the cab and find that big, round engine-to-chassis harness connector. Before you unplug anything, grab your phone and take a few pictures. Document the orientation, how the loom is routed, and any securing clips. This costs you nothing and can save you a massive headache during reassembly.
Inspection Is Everything: Clean or Replace?
With the connector halves separated, you get your first real look at the enemy. You'll probably see a mix of dirt, moisture, and that tell-tale green or white powder—the calling card of corrosion. The critical decision you have to make right now is whether you can clean and save the existing terminals or if they need to be cut out and replaced entirely.
- Surface Tarnish: A light, dull film on the pins is often just oxidation. This can usually be handled with a good quality, plastic-safe electrical contact cleaner and a small nylon brush.
- Green Crust (Copper Corrosion): This is the classic sign that moisture has been living in there. If it’s just on the surface of the pin, you might be able to clean it off. But if the pin itself looks pitted, damaged, or eaten away, it has to go. A compromised pin creates high resistance, which is the root cause of all your problems.
- White Powder (Aluminum Corrosion): While less common in these specific pins, it signals a severe moisture breach. Terminals showing this are almost never salvageable.
Don't be tempted to just spray it out and plug it back in. That's a temporary fix, at best. If a pin is physically thinned or damaged by corrosion, its ability to carry current and maintain a solid connection is gone forever. Cutting it out is the only real, long-term solution.
Here’s a simple look at the field repair process we're following. It’s a repeatable workflow to get your JCB 3CX back in action fast.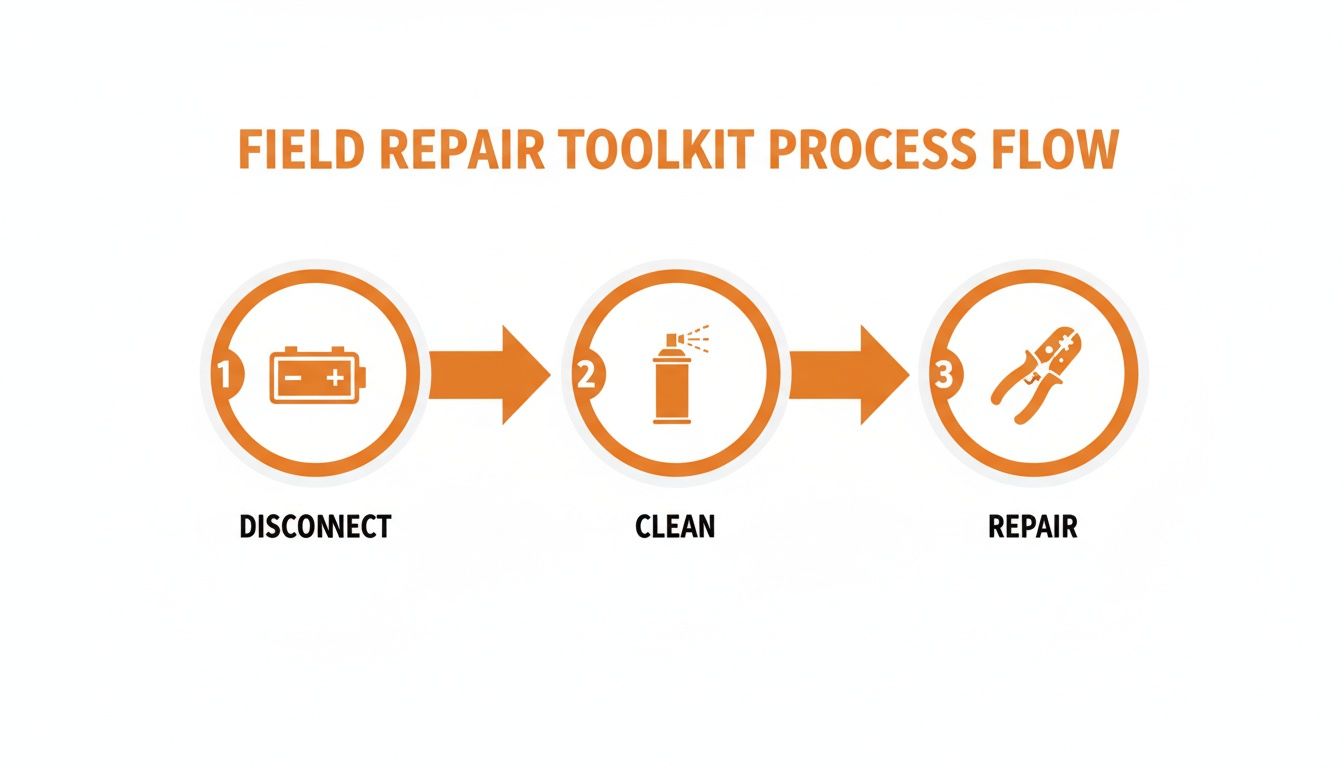
The flow is straightforward: properly disconnect the power for safety, meticulously clean and assess the damage, and then execute a professional-grade repair.
Depinning and Crimping Like a Pro
If you've identified terminals that need to be replaced, it's time for surgery. This is where having the right terminal removal tool is non-negotiable. Don't even try using a pick or a small screwdriver—you'll just mangle the connector's internal locking tabs, and the new pin will never seat correctly. Slide the correct tool over the pin from the contact side to release the tangs, and the wire should pull out easily from the back.
Once the old terminal is out, snip it off, leaving clean wire. Strip back about a quarter-inch of insulation. Now for the most critical step: the crimp. A cheap pair of pliers from the hardware store won't cut it. You need a proper ratcheting crimper that creates a solid, factory-spec indent crimp on the new terminal. A poor crimp is just another point of failure waiting to happen. Slide the new weather seal onto the wire first, make your crimp, and give it a firm tug to make sure it’s solid.
While you're at it, inspect the wire itself. Bend it gently near the connector. If it feels stiff or crunchy, that's a classic sign of internal corrosion—what we call the "black wire of death"—where moisture has wicked up under the insulation. If you find this, you'll need to cut back until you hit clean, bright copper strands.
Sealing the Deal Against Future Failures
After you've cleaned the good pins and replaced the bad ones, the final step is to future-proof your work. Before reconnecting the harness, apply a liberal amount of quality dielectric grease inside the connector. Don't just dab it on the pins; fill the cavities where the pins seat. This grease does two things: it displaces air and moisture to prevent future corrosion, and it lubricates the seals, ensuring a tight, weatherproof fit.
Gently push the newly crimped terminals back into their correct slots in the connector until you hear or feel a faint click. This confirms the locking tangs have engaged. Reference the photos you took earlier to be 100% sure everything goes back in its original position.
Once all the pins are seated, carefully push the two halves of the connector together until they lock. The dielectric grease might make it a bit stiff, but you should get a solid "thunk" as it seals. Secure it back in its mounting bracket, reconnect your battery (positive terminal first, then negative), and you're ready for a test run. This thorough approach to the JCB 3CX electrical connector corrosion under-cab fix is what separates a permanent repair from a temporary patch that will have you back under the machine in six months.
Future-Proofing Your Electrical Harness
Fixing the connector once is just putting out a fire. The real win is making sure you never have to crawl under that cab for the same problem again. This is about making your machine’s electrical system tougher than the factory ever intended, so it laughs at the mud, salt, and pressure washers that caused the failure in the first place.

Simply slapping some generic grease in the plug isn't going to cut it. The environment under a JCB is brutal, and you need products that can stand up to the abuse. Forget the cheap stuff; it just turns to watery gunk after a few heat cycles and washes out. You need a high-quality, non-conductive dielectric grease that stays put.
Choosing Your Armor Against Corrosion
The right compound creates a permanent, waterproof barrier against the elements. Honestly, this is the single most important step in the whole process. Using the right stuff makes the difference between a one-year fix and a ten-year fix.
Here’s a quick rundown of what we’ve seen actually work out in the field:
- Premium Dielectric Grease: I'm not talking about the tube you grab at the parts-store counter. Products like Nyogel 760G are silica-thickened synthetic greases made specifically for sealing electrical connectors from moisture and fretting corrosion. They have a wide temperature range and won't dry out or wash away.
- Corrosion Prevention Compounds (CPCs): Think military-spec products like ACF-50 or CorrosionX. These are ultra-thin film compounds that actively penetrate and neutralize existing corrosion while leaving a protective layer behind. They're fantastic for coating the outside of the harness and connectors after everything is reassembled.
You're creating a sealed system. The goal is to completely fill every air void inside that connector housing with a stable, non-conductive compound. Moisture can't get in if there's no space for it to occupy.
Data from the field backs this up. A historical look at JCB electrical repairs showed a massive 35% spike in failures between 2000 and 2010 directly linked to ungreased connectors from the factory, costing fleets thousands per ECU-related fix. We've seen that when operators started properly greasing connectors, the lifespan of those components tripled, especially in salt-heavy environments. You can discover more insights about how grease impacts JCB electrical problems on HeavyMachineryClub.com.
Corrosion Preventative Compound Showdown
Choosing the right product can feel like a shot in the dark, but it really comes down to your environment and how you apply it. Here’s a head-to-head look at some of the best options out there to help you decide.
| Product Type | Best For | Application Tips | Estimated Cost |
|---|---|---|---|
| Dielectric Grease (Silicone-Based) | Sealing internal connector pins from moisture and corrosion before assembly. | Apply directly into the female side of the connector. A small bead pushing out on connection confirms a good seal. | $10 - $20 per tube |
| Battery Terminal Protector (Spray) | Protecting external battery posts and cable clamps after they've been cleaned and tightened. | Spray a light, even coat over the entire connection area. The red or purple color makes it easy to see coverage. | $8 - $15 per can |
| ACF-50 (Aerosol or Liquid) | Treating the entire harness, exterior of connectors, and hard-to-reach areas. It "creeps" into seams. | Spray a light mist over the assembled harness. Reapply annually in harsh, salty conditions. | $20 - $30 per can |
| Fluid Film (Lanolin-Based) | General-purpose protection for undercarriage components and the outside of electrical looms in wet, muddy areas. | Apply liberally to frames and harnesses. It stays wet and actively resists wash-off, but can attract dirt. | $12 - $18 per can |
Ultimately, the best strategy is a combination: dielectric grease inside the connectors and a corrosion-inhibitor spray like ACF-50 outside the assembled harness. This gives you a complete, layered defense.
Application Is Everything
How you apply the grease is just as important as which one you choose. Don't be shy with it. The real goal is to fully pack the female side of the connector before you plug it back together. Use a small brush or a clean finger to work the grease down into each terminal socket.
When you reconnect the two halves, you should see a small amount of grease push out around the seal. That’s your confirmation that you've got a complete fill. Just wipe away the excess, and your internal components are now fully protected from the elements.
Reinforcing the Weak Points
The connector housing isn't the only place water can sneak in. Take a hard look at where the wiring harness enters the cab or passes through frame members. Are the rubber grommets still intact and seated properly? A cracked or dislodged grommet is a wide-open invitation for water to run right down the loom and straight into your freshly repaired connector.
Finally, check the loom routing itself. Make sure the harness isn't sitting in a low spot where water can pool. A couple of strategically placed zip ties can lift the harness an inch or two, creating a "drip loop" that encourages water to run off instead of settling in. Combine this with a properly sealed connector, and you've built a system that will keep you working, not waiting on a tow to the dealer.
Sourcing Parts Without the Dealer Markup
The dealership wants you to think they're your only option. They want you to believe that a simple connector pin or weather seal is some kind of proprietary, space-age component that only they can provide. That’s how they justify week-long lead times and prices that make your eyes water.
It's a load of garbage, and it’s keeping your machine down longer than it needs to be.
This is your new parts bible. Forget waiting on hold with the dealer's parts counter. We're going to bypass them entirely, save you a pile of cash, and get your machine turning dirt again, faster. The parts you need for this JCB 3CX electrical connector corrosion under-cab fix are not unique to JCB; they are standard industrial components you can buy from multiple sources.
Breaking the Dealer's Monopoly on Parts
Here's the big secret: JCB, like most equipment manufacturers, doesn't make its own connectors. They buy them from major industrial suppliers like Deutsch (now part of TE Connectivity) and Amphenol.
This means you can cross-reference the parts you need and buy them directly from an industrial electronics supplier or a specialist like Flat Earth Equipment.
Here’s the game plan:
- Identify the Connector Series: The main engine-to-chassis connector is often a Deutsch HD or HDP series connector. Look for markings on the connector housing itself.
- Identify the Terminals: Once you've depinned a terminal, you can identify its size (e.g., Size 16 is common for signal wires) and type (male pin or female socket). These are often stamped with part numbers.
- Cross-Reference and Order: Armed with this information, you can order the exact pins, sockets, and seals you need—often for a fraction of the dealer's price. A bag of 50 high-quality terminals from a real supplier might cost what the dealer charges for five.
Don't fall for the knock-offs. There's a big difference between a cheap, flimsy terminal from an online marketplace and a quality component that meets or exceeds OEM specs. Stick with reputable suppliers who sell genuine TE Connectivity, Amphenol, or equivalent parts. Your repair is only as good as the weakest part you install.
Sourcing From the Right Places
Once you know what you need, where do you get it? The dealer is your last resort, not your first call. Your best bet is to go straight to the source.
Companies like Flat Earth Equipment live and breathe this stuff. They know the parts that fail and keep them on the shelf, ready to ship. They understand that downtime costs you money every hour. They can often get you the right sensor, solenoid, or connector kit overnight, while the dealer is still "checking their inventory."
It's about taking back control of your supply chain and your uptime. While you're at it, keeping your machine's batteries in top shape is crucial; you can find helpful information on maintaining them with our expert guide on industrial-grade battery chargers.
A Word on Quality and Your Bottom Line
Be wary of parts that seem too cheap to be true. A proper terminal is made from high-quality copper alloy and plated to resist corrosion. Cheap knock-offs often use inferior materials and plating that will fail within a year, putting you right back under the cab doing the same job again.
The goal here isn't just to save a few bucks on parts; it's to reduce your total cost of ownership by eliminating downtime. Paying a fair price for a quality component that ships today is always a better deal than getting a "discount" on a part that shows up next Tuesday.
By sourcing your own parts, you're not just fixing a machine—you're getting smarter, more independent, and more profitable. You're taking the dealer's laptop and their wait times out of the equation for good.
Field Notes and Frequently Asked Questions
I've heard it all from guys wrestling with this exact problem. You're under the cab, hands covered in grease and dirt, with a handful of wires and a whole lot of questions. Here are the quick, no-nonsense answers to the most common things that come up when you're staring down a JCB 3CX electrical connector corrosion issue.
The biggest mistake I see is guys getting scared of the wiring. They see a cannon plug with two dozen pins and immediately think they need the dealer's laptop to figure it out. That's exactly what the dealer wants you to think.
In reality, most of these circuits are simple 12-volt power, ground, or sensor signal lines. You don't need a degree in computer science to fix them; you just need a good multimeter and the patience to chase the problem to its source. The dealer relies on you being intimidated by the complexity, but it’s almost always just a simple, physical failure.
Can I Just Cut the Whole Connector Out and Splice the Wires?
I get this question a lot, especially when the connector is a corroded, melted mess. Technically, yes, you can. But should you? Absolutely not.
That main connector isn't just there for convenience; it's a critical service point. It allows the engine and transmission to be separated from the chassis during major overhauls without cutting a single wire. Using butt connectors is asking for trouble—you're turning one potential failure point into 29 individual ones. Each one of those splices is a new place for moisture to get in and start the whole corrosion process over again.
The only proper fix is to replace the bad pins and seals, or if the housing is shot, replace the connector plug itself. Doing it right the first time is always faster than doing it twice.
My Machine Is Stuck in Limp Mode. Will This Fix It?
If the limp mode is caused by a fault code related to a sensor that runs through that main harness—like a DPF pressure sensor, NOx sensor, or transmission solenoid—then yes, there's a very high chance this repair will clear it.
The machine's ECU goes into limp mode as a self-preservation tactic when it gets bad or illogical data from a critical sensor. A corroded pin garbles that data, making the ECU think a major component has failed. By restoring a clean, solid connection, you're giving the ECU the correct information it needs to operate normally.
Why Does This Happen More on Newer JCB Machines?
It’s the emissions systems, plain and simple. The older, mechanically injected machines had a much simpler wiring harness. Modern Tier 4 engines, with their DPF and AdBlue/DEF systems, are loaded with sensitive sensors and modules.
The CAN bus network that connects all these modules is extremely sensitive to voltage fluctuations and resistance. A tiny bit of corrosion that an older machine wouldn't even notice can be enough to throw the entire system into chaos, triggering a derate or a failed regen cycle.
Have a specific question about your machine or need a hard-to-find part number? Don't hesitate to reach out to our team of technicians for some real-world advice. We've seen it all and can help you get to the bottom of it.
When the dealer tells you it’ll be a week just to get the parts, that’s a week you’re not making money. Flat Earth Equipment has the high-quality terminals, seals, sensors, and connectors you need on the shelf, ready for same-day shipping. Stop waiting and start fixing. https://flatearthequipment.com